
Where to add your grade on different style briefs
Howdy Howdy
Another week zooms by and I didn’t get chance to write up a blog last week. Sat in my note book is a couple of sketches of briefs, where I was explaining to someone where to apply different grades, when you have style lines on your briefs.
I asked quite a lot of questions about grading, or I know people get stuck when the pattern isn’t a straight forward pattern. So let me take you through some grading.
Basic grades
If you’ve read my book about grading or even the spec book *shameless plug, then you’ll know a bit about the increases and decreases of grade points.
When you grade a brief, around the body you need to increase (or decrease if smaller) by 5cm and through the rise (back to front) by 2cm.
So this is 2.5cm on the front pattern across and 1cm up on the pattern, so if your pattern was folded in half then 1.25cm (half of 2.5cm) would be applied to your pattern. This is the grade rule that I’ve always followed, some companies like to increase their gusset width, within some size ranges and also the side seam, but for this, let’s keep things simple.
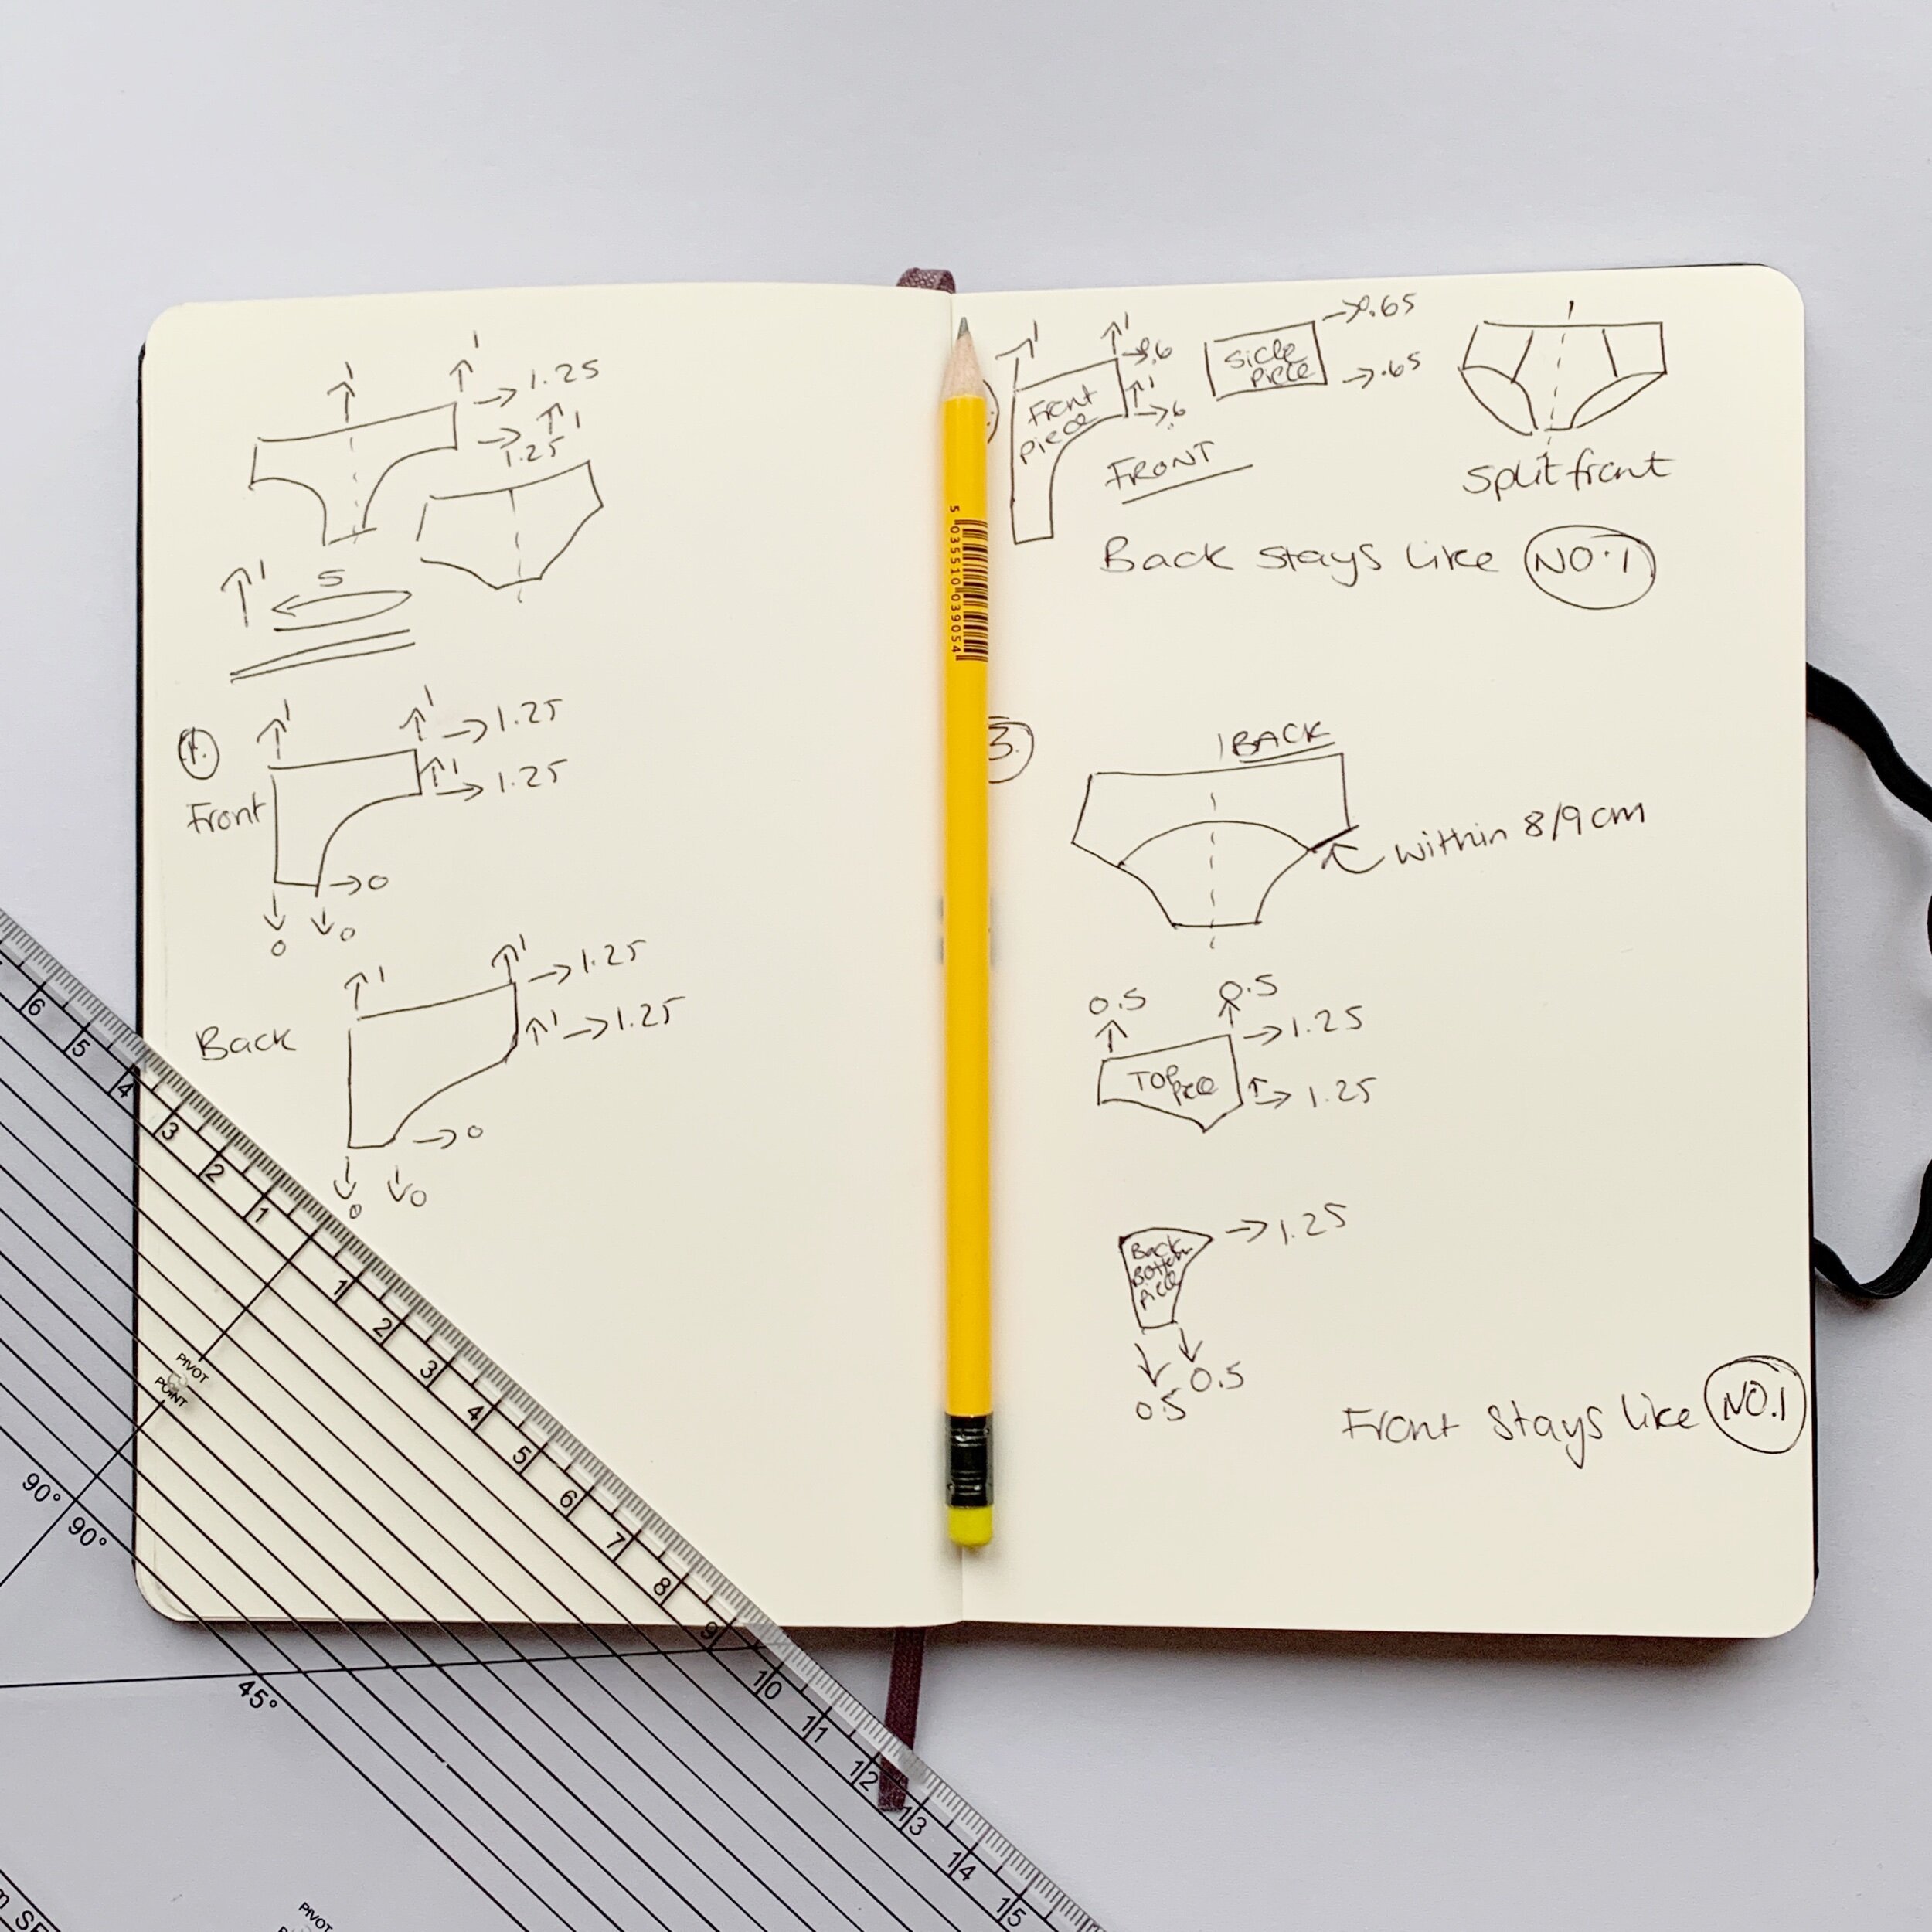
So the first picture (left page) shows what the pattern looks like halved, and where the standard grade goes, 1cm up at the CF and CB, 1cm up on both the side seam points (ensuring then the side seam stays the same) and 1.25cm going out on both side seam points with the gusset part not grading.
Learn this and you are grading.
Second picture (top right) is if you have a side piece on the front of the brief, so you have a centre piece and two side pieces.
On the centre piece you would go up 1cm on both points and the lower point, and only by 0.6cm as you are splitting the grade 1.25cm equally across both pieces, so as you get into the bigger sizes, the brief will aesthetically look like a smaller brief.
The side piece only goes out 0.65cm ( 0.6cm +0.65 = 1.25cm) *side note if you were computer grading the grade would split equally across the pieces both being 0.625.
Third picture (bottom right) is a back that has a curve split across the back (like the Tippi pattern) , the main thing to do is to keep to any curve consistent, so what you add to one part of the curve you add to the mirroring part (of the pattern).
The brief increases depth by 1cm so each pattern needs to increase by 0.5cm (0.5cm+0.5cm = 1cm) , if you added the 0.5cm, onto the top of the bottom pattern, then you would have to add it on to the bottom of the top pattern curve, (Crikey you may need to read that tongue twister again) and when you start to add to the curve it can distort. So if you can avoid adding directly onto the curve then bonus!
So 0.5 gets added onto the top of the CB of the brief and both side seam points (I haven’t written it on but it should be next to the blank arrow), and then 0.5cm gets added onto the bottom pattern at the gusset point.
The 1.25cm goes on both side seam points, and also on the lower curve of the bottom pattern, as the pattern curve started down at 7.5cm I was able to put the full grade of 1.25cm on the point, had it been more than 10cm then the grade would be more like 0.8cm.
I am hoping to set up some video tutorials of grading, as it’s easier to understand when you can see it.
Hoping to have time for that before the kids move out!!
Meanwhile if you want to read a book about grading head below:
Master Bra & Brief Grading—Your Lingerie Designs Deserve the Perfect Fit!
Stop getting stuck at the sampling stage! Whether you're an aspiring lingerie designer or already in the industry, this is the book you need to confidently grade bras and briefs like a pro.
With easy-to-follow, step-by-step instructions, you'll learn exactly where and how to place the grade to ensure a flawless fit every time. Each pattern piece is visually demonstrated, showing you precisely how it moves, so there’s no guesswork involved.
By the end of this book, you’ll:
- Know exactly how much a bra and brief should grade by
- Understand where to place the grades for a perfect fit
- Confidently adjust patterns without compromising the design
And if you ever get stuck? Snap a pic of your grade (along with your order number), send it over, and I’ll personally help you troubleshoot!
Don’t let grading hold you back—grab this book now and bring your lingerie designs to life!