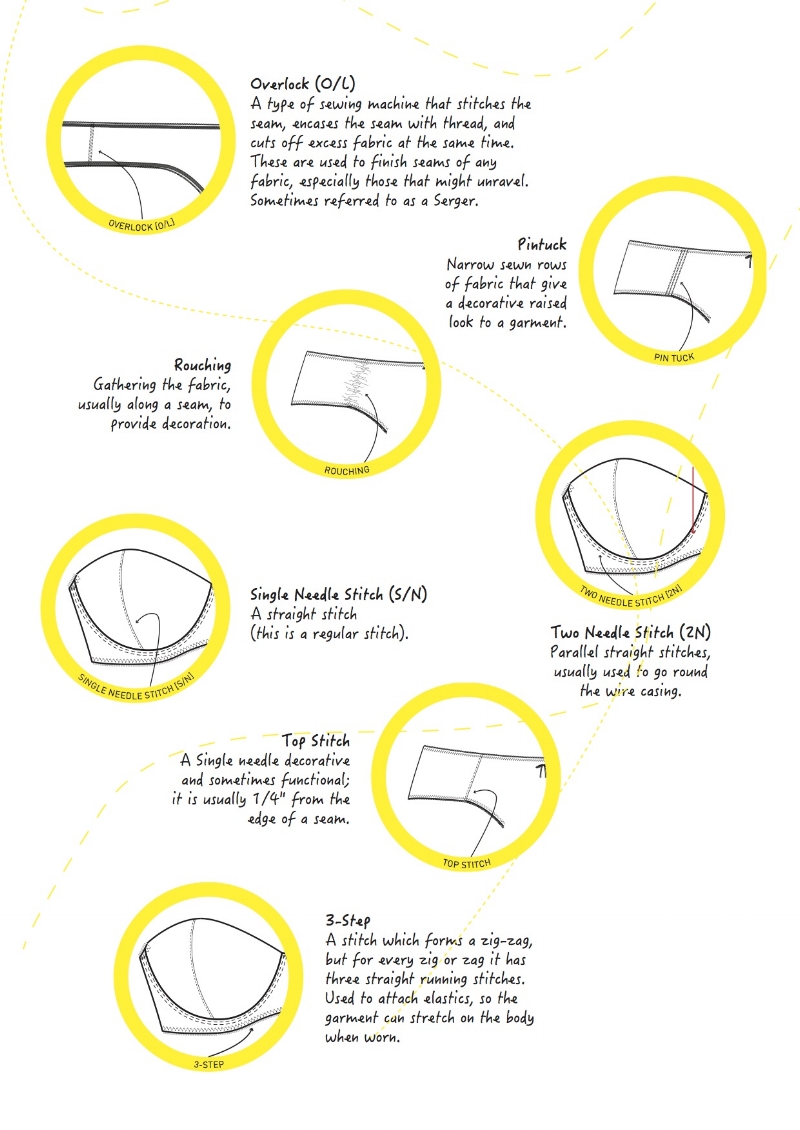
How to attach elastic with 3-step stitch
If you are wanting to make your own lingerie, whether that it is learning to sew yourself, or needing to know what stitch to use when writing a tech pack. The three-step stitch is a similar stitch to zig zag but instead of just going up and down like a zig-zag stitch does, the stitch literally does what it says and takes three steps (sews three stitches on the up and three stitches on the down).
This stitch is useful when you are using non stretch fabrics and the because the stitch takes three-steps on the up and three steps on the down it allows for more stretch and non cracked stitching.

The beauty of three-step is that you can do it one operation (unlike the zig-zag stitch where by you usually attach the elastic with zig-zag then turn it under the garment and secure it with another line of zig-zag stitching).
The down side of using a three-step stitch is that you are governed by the width on your sewing machine.
I usually use the 3-step stitch either with non stretch fabrics (briefs), as this stitch is good is you are needing more tension on your elastic to stretch. (I wrote about how much tension you need to apply here), or I use this stitch on lower wings, under-bands, or top of wings.
Below is a extract from the book How to write a tech pack for a bra and brief which has all different descriptions of type of stitching.
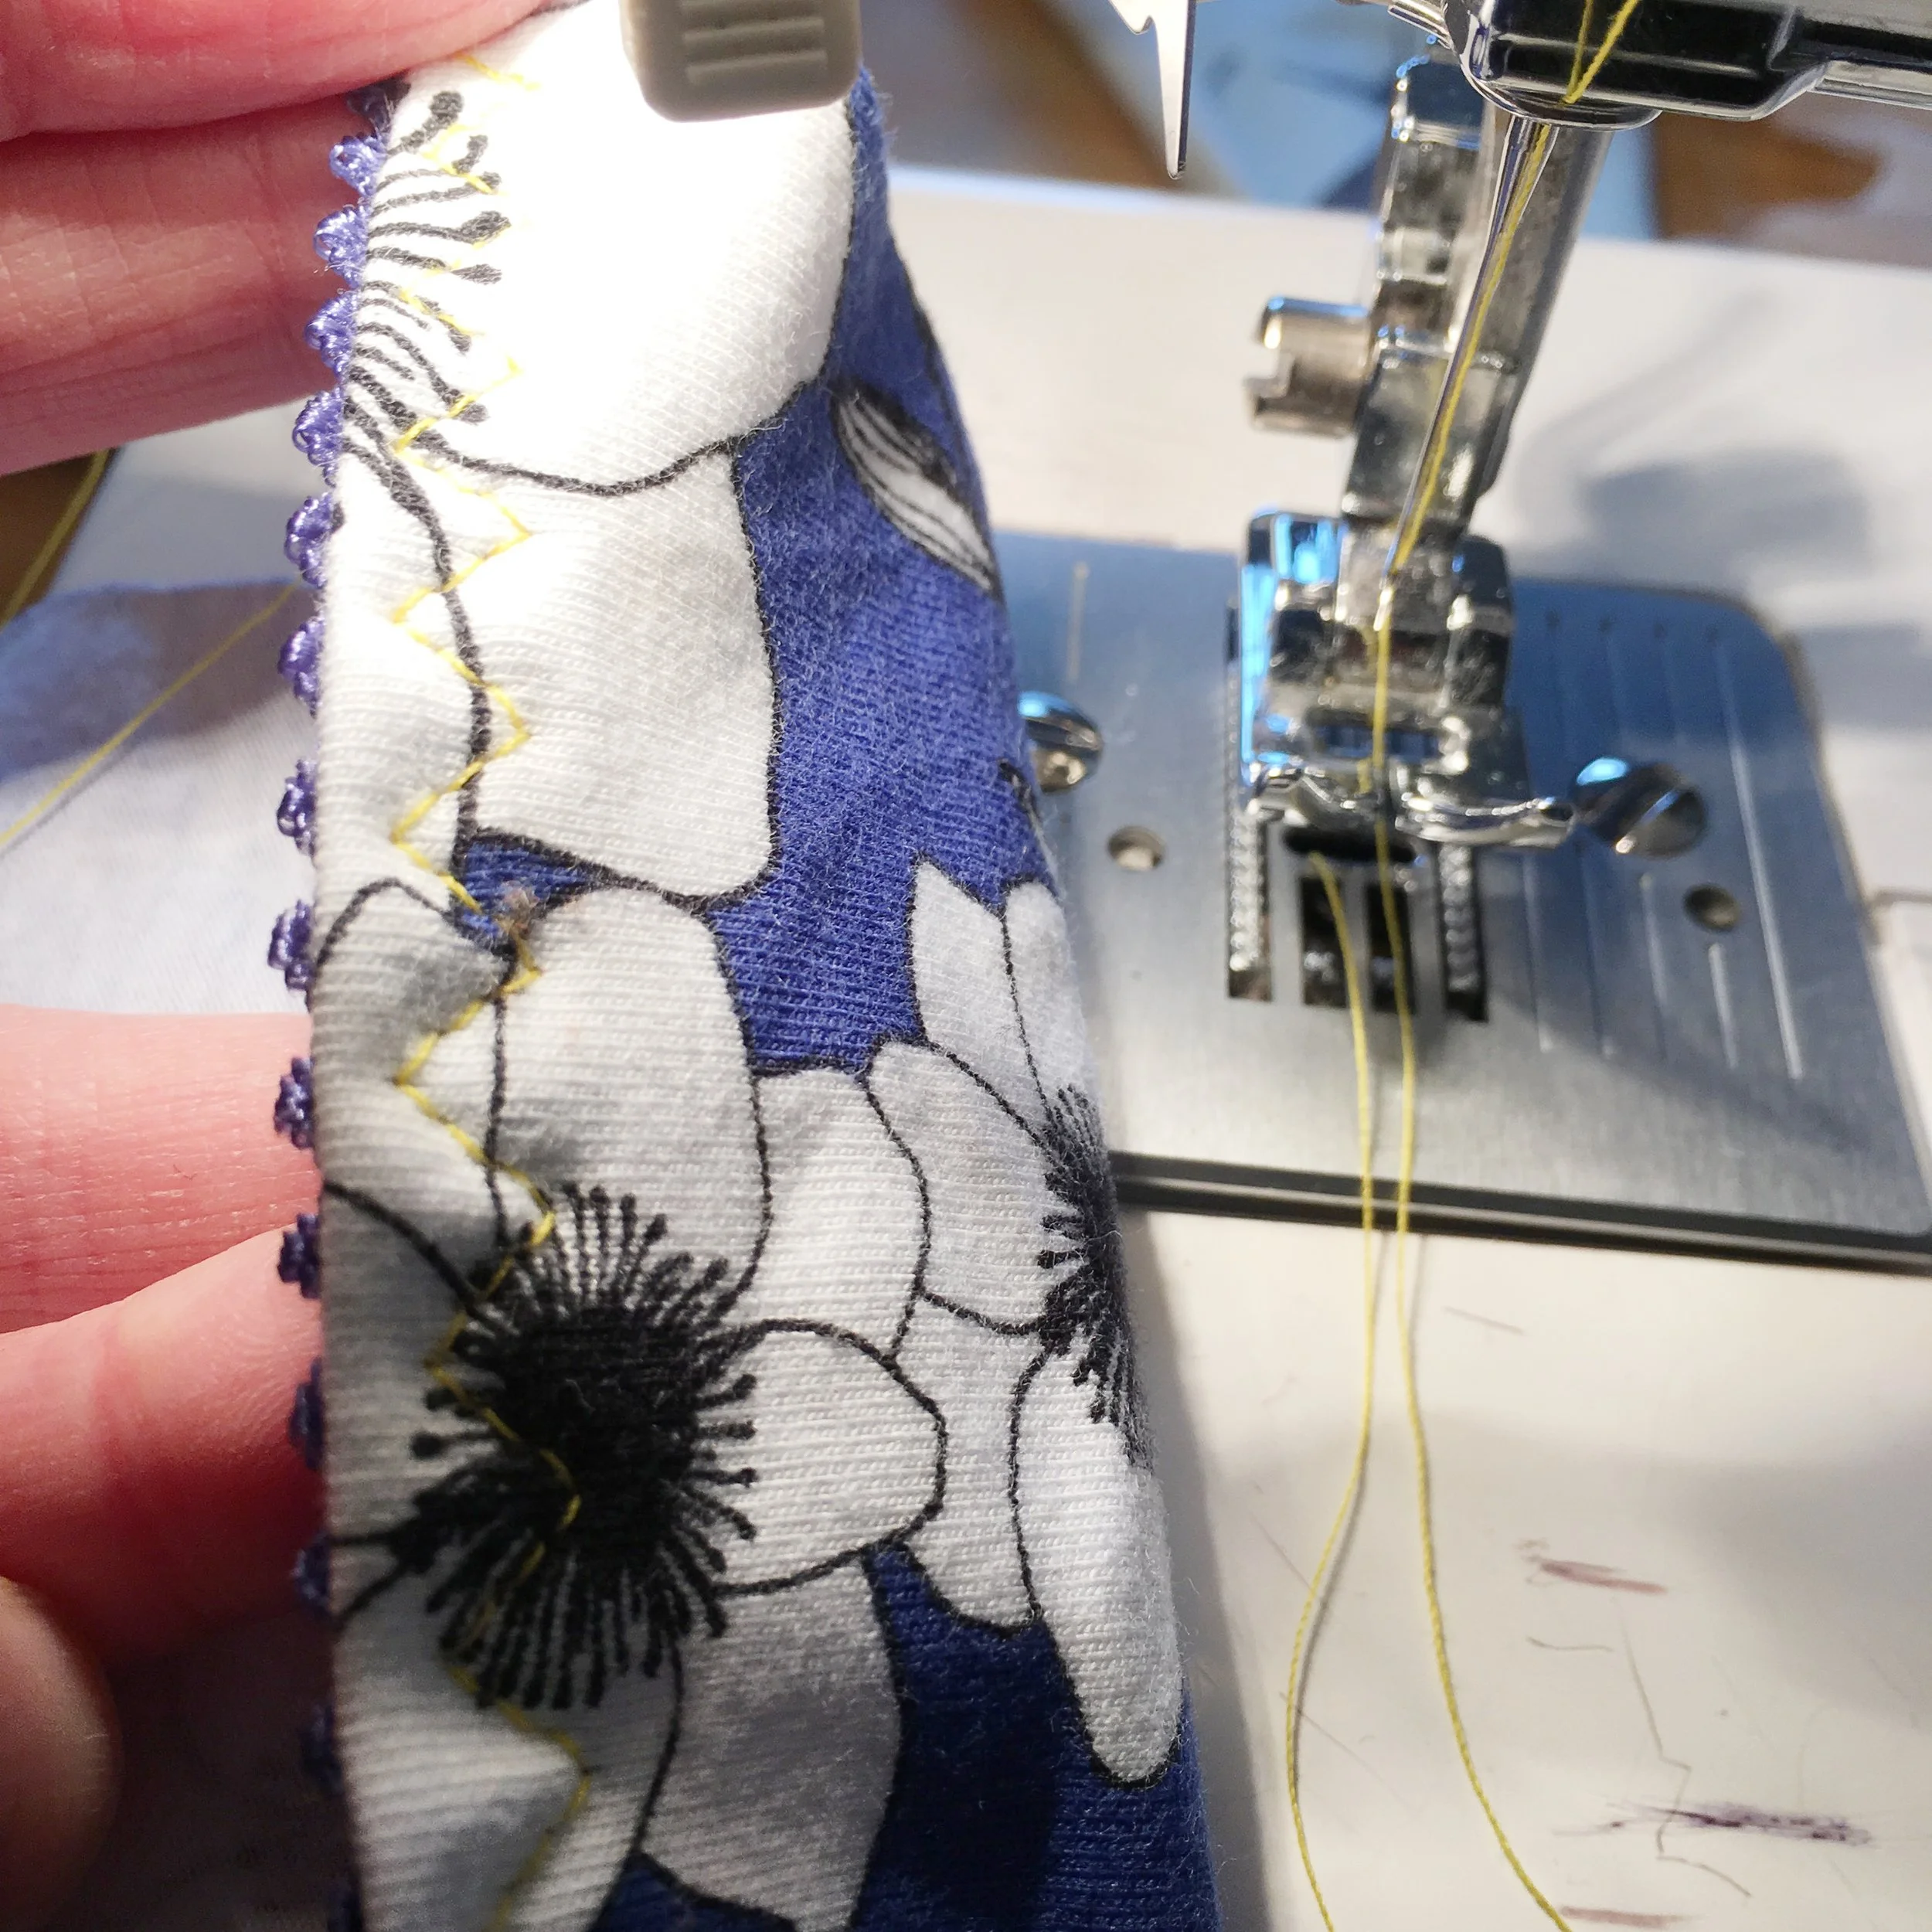
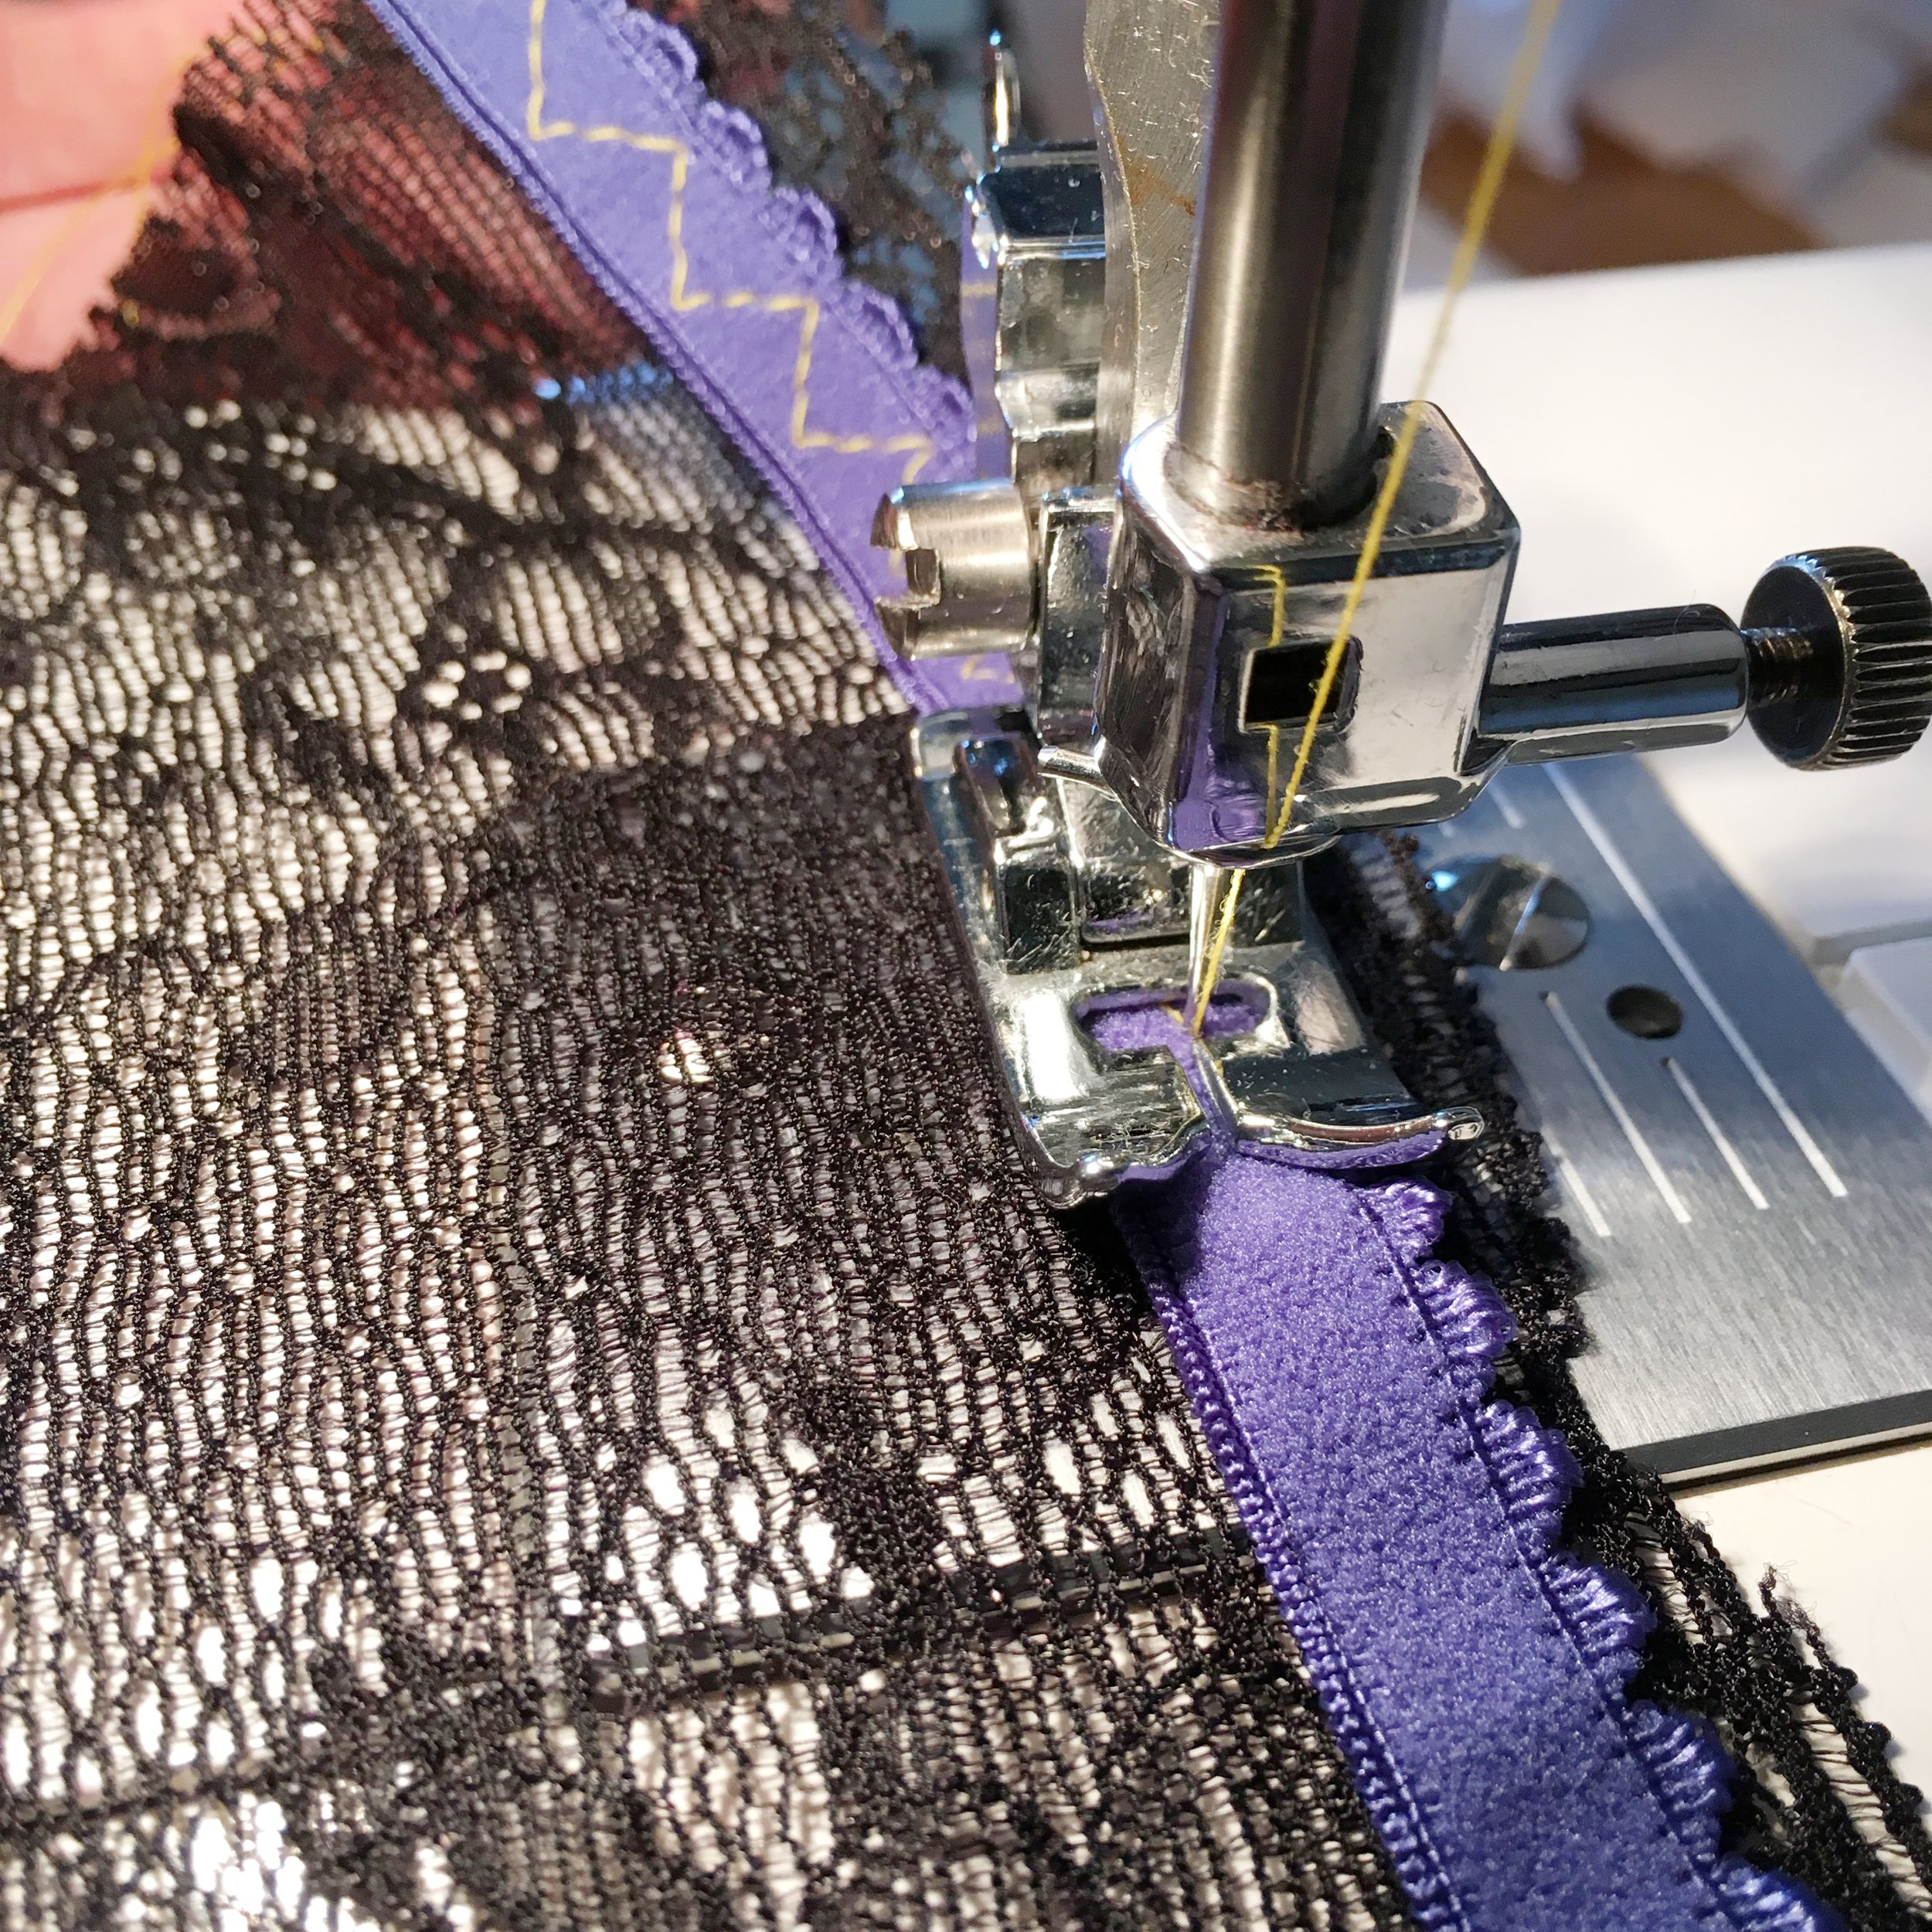
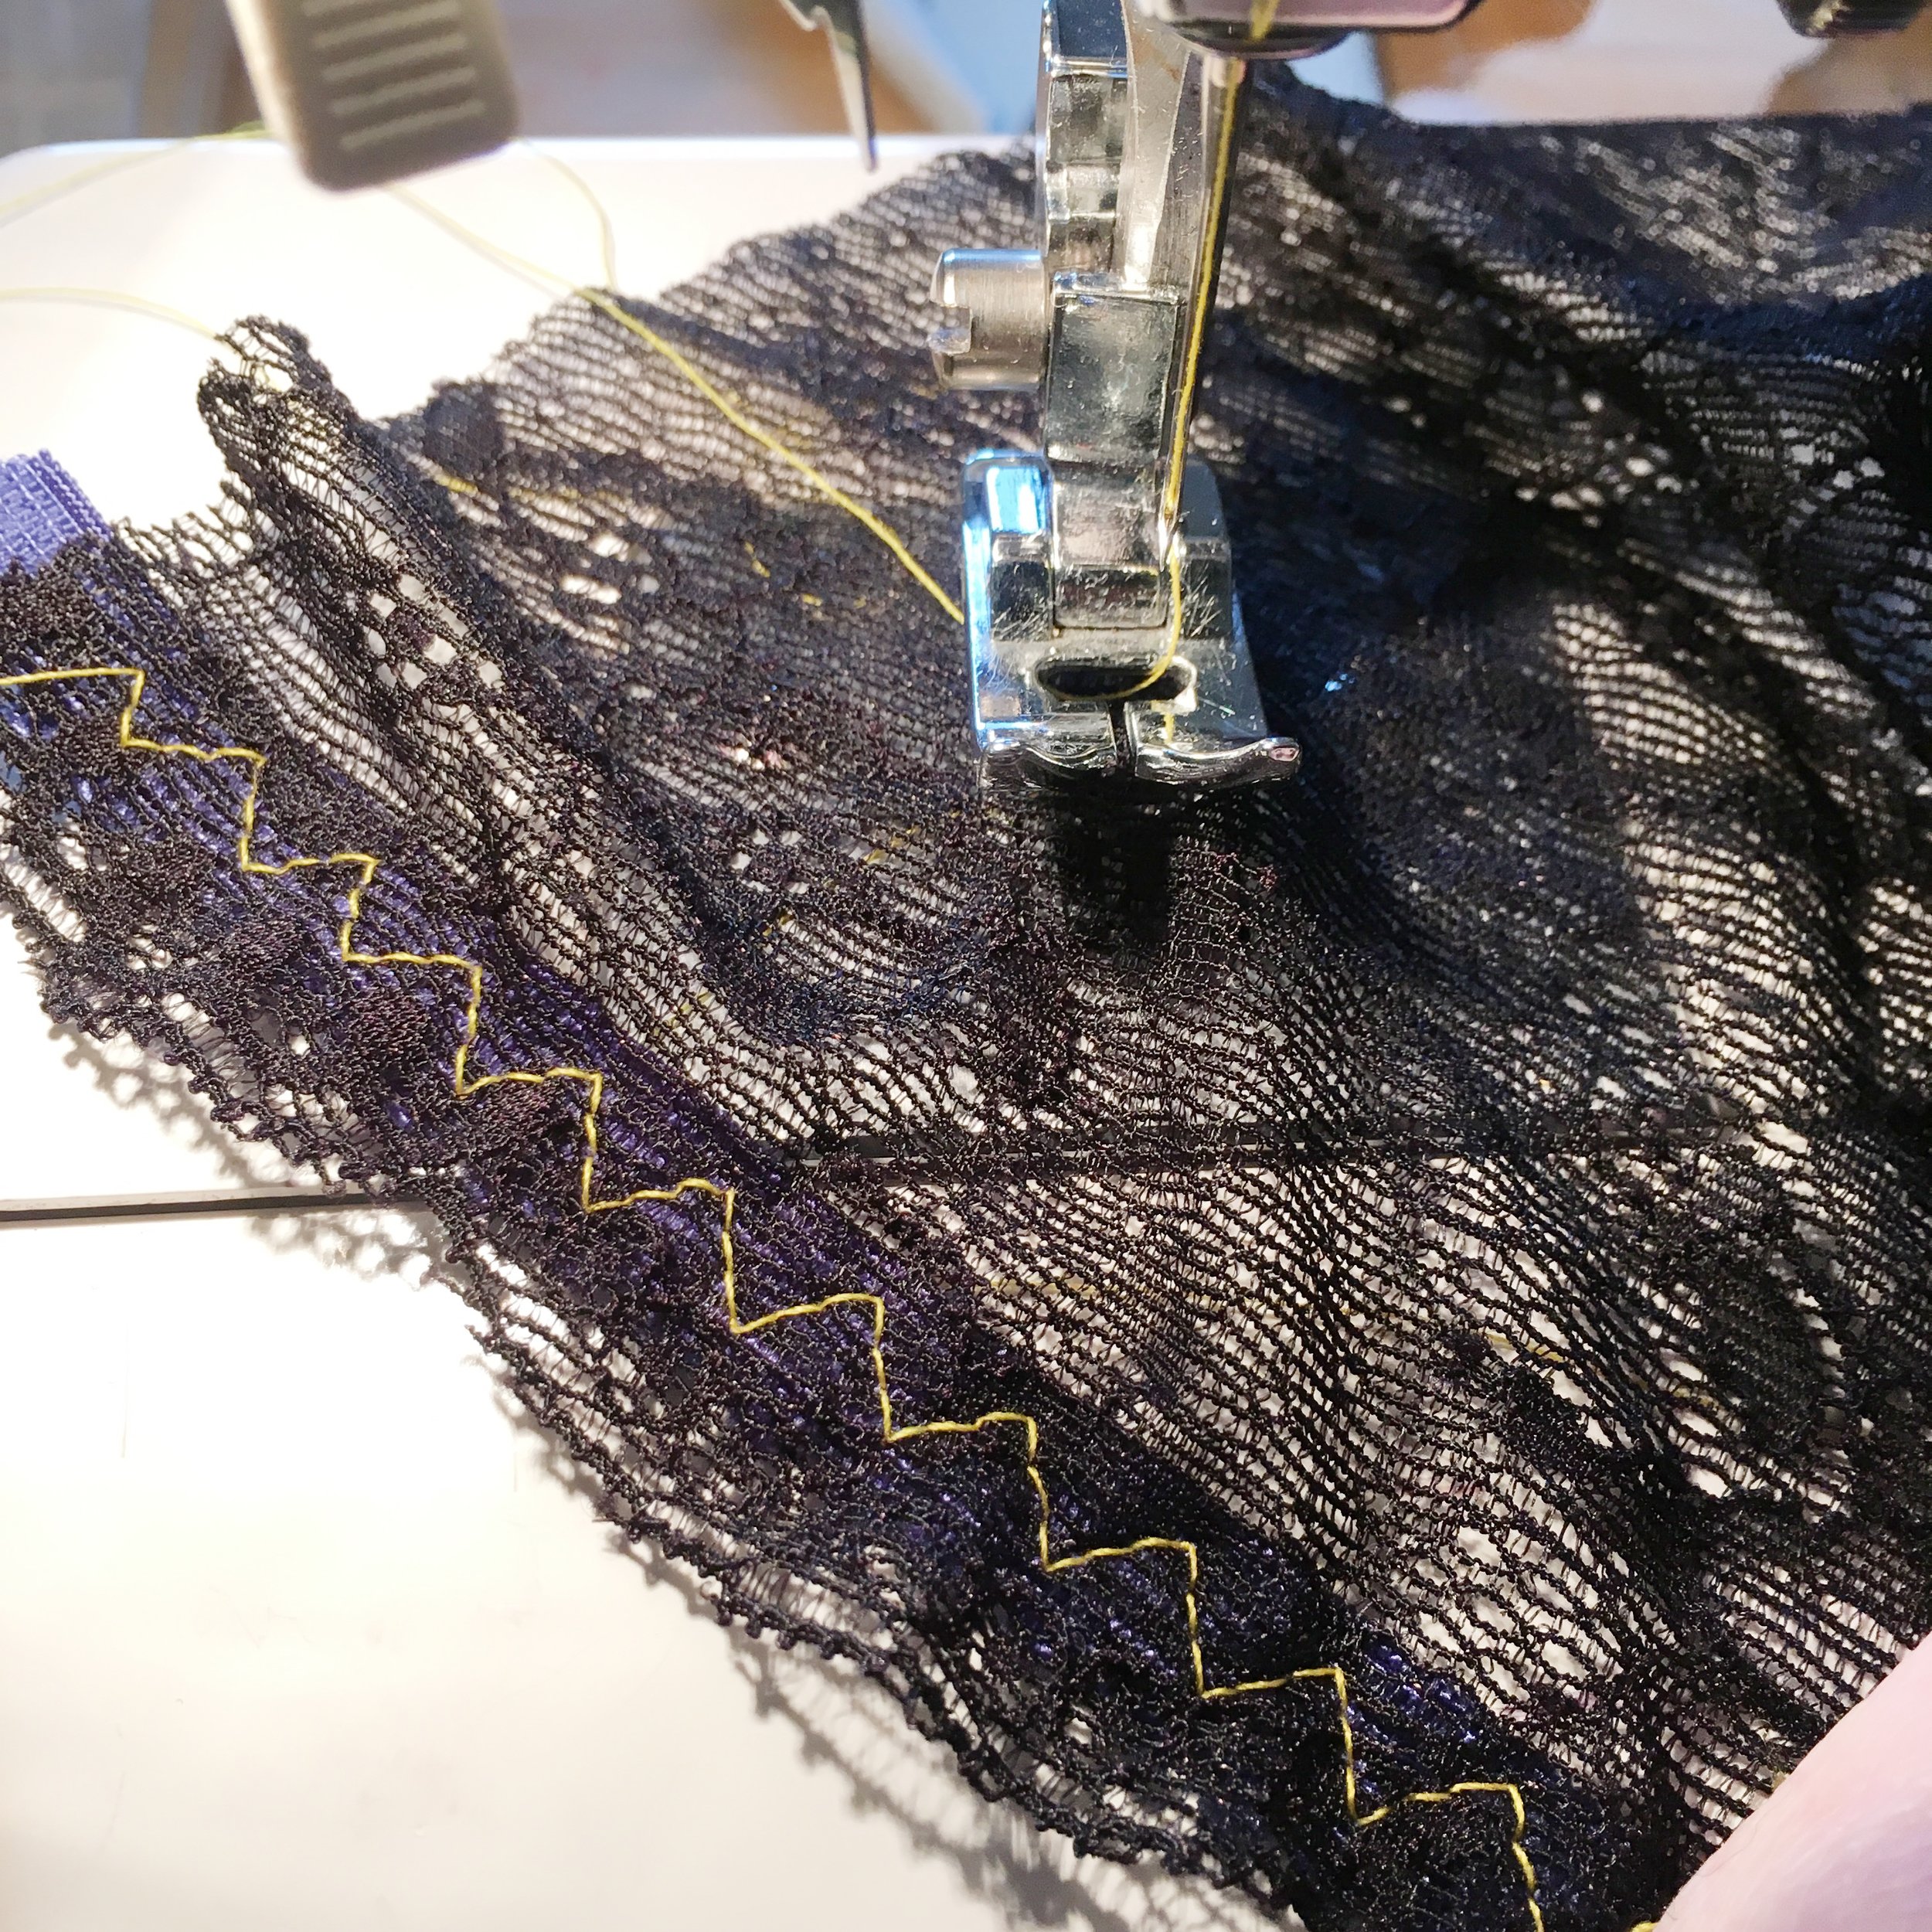
I also use this stitch when I need to put elastic behind a lace edge and turning the elastic is not an option.
Depending whether you are putting the elastic behind a scallop or on the edge of the fabric depends whether you are turning your fabric (seam allowance).
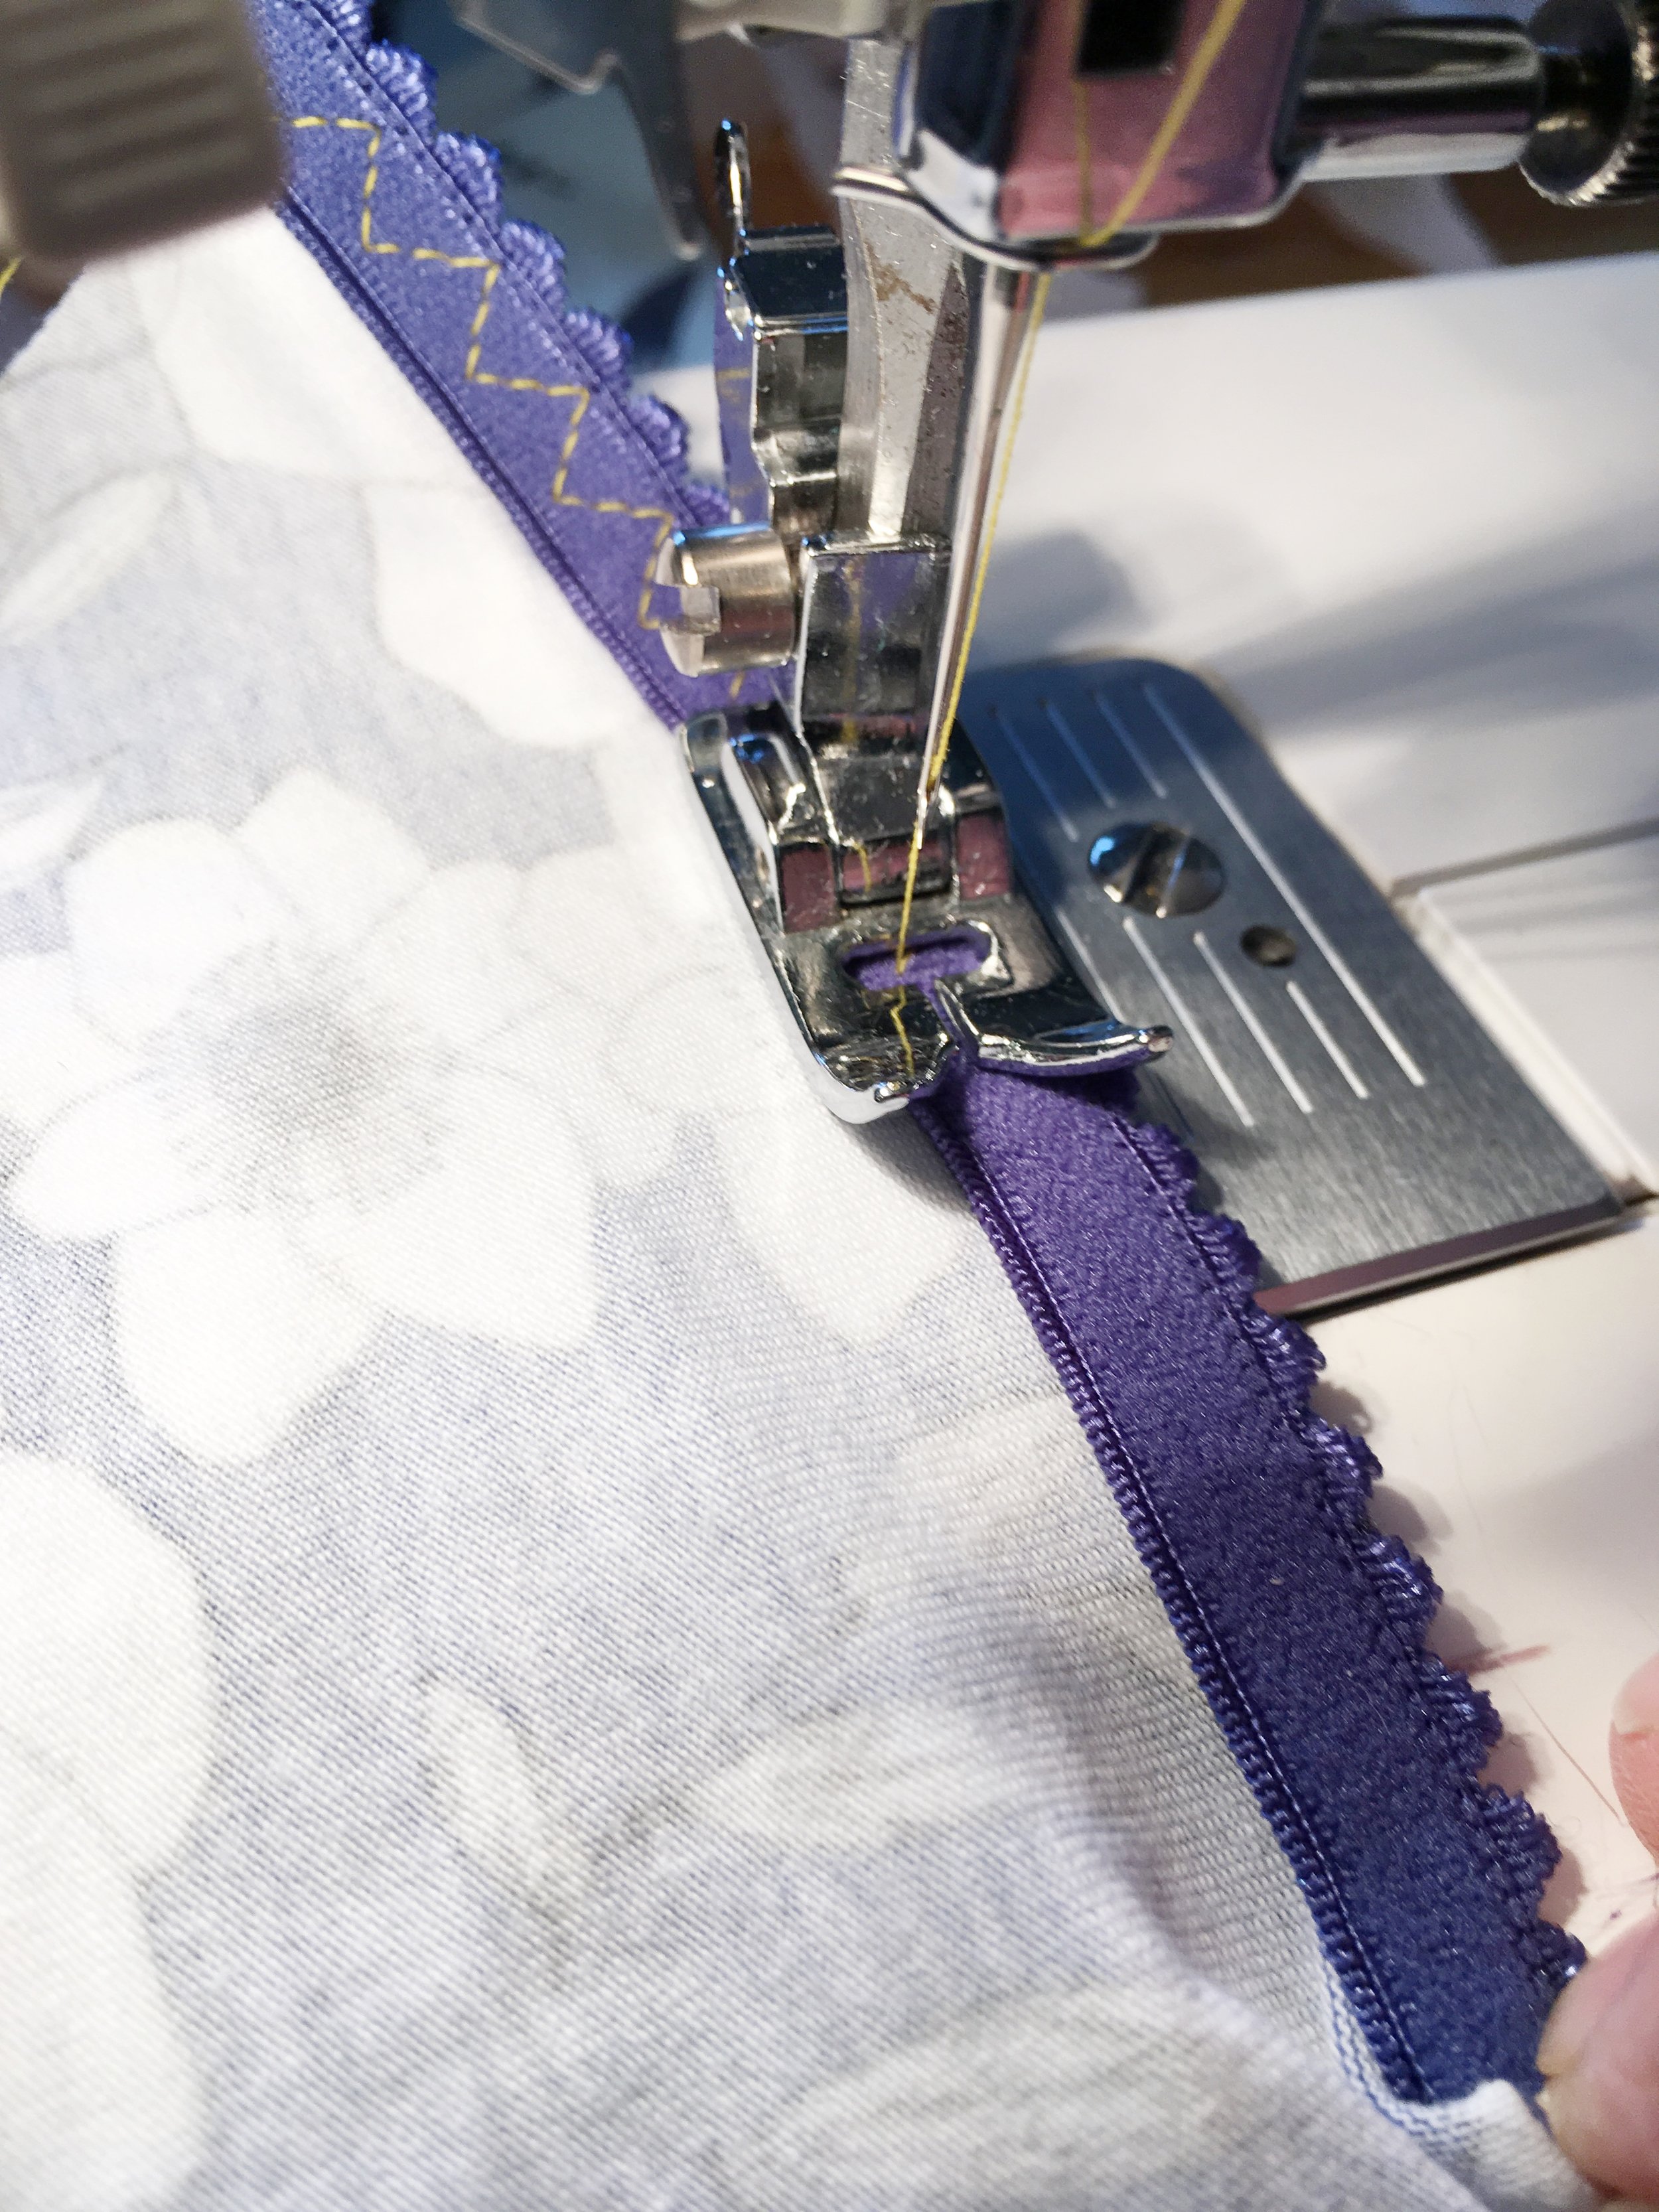
SEWING THREE-STEP STITCH WITH LACE
If behind the scallop of the lace, then put the lace down with right side down onto the sewing machine, so the inside of the garment is facing up towards you. Then place the elastic brushed side up, just at the base of the scallop.
Stretch the elastic to the desired amount and begin to sew, and that’s it! If you find it easier to sew with the elastic under the fabric then you reach the same outcome (just reverse it so the right side of the fabric is facing you), it’s just that I find it easier especially when beginning to see where about’s your elastic is going and where the stitches are in relation to the elastic.
SEWING THREE-STEP STITCH WITH NON-EDGE FABRIC
If you are attaching the elastic on a cut edge of fabric, with the fabric right face down, turn the amount of seam allowance you have allocated inwards, and placing the elastic over this (right side facing you) begin to sew, stretching the tension of the elastic as you sew.
Again if you want to sew with your elastic underneath the fabric ( reverse it so the right side of the fabric is facing you and you turn the seam allowance under the fabric, with the elastic underneath).
It’s all a matter of personal choice.