Seam allowances secrets on lingerie and swimwear patterns
Seam Allowance Secrets: Lingerie vs. Swimwear (And How to Adjust Your Patterns Like a Pro!)
So, you’re diving into the world of lingerie design—exciting! But if you’re also dabbling in swimwear, you might have noticed something weird: lingerie patterns typically come with a 6mm seam allowance, while swimwear patterns can have 8mm. That tiny 2mm difference may not seem like much, but trust me, it matters! Let’s break it down so you can confidently tweak your patterns and create pieces that fit and function beautifully.
Why Is Swimwear Seam Allowance Bigger?
It all comes down to rubber width (yes, really!). Whilst you can buy some swimwear rubber at 6mm, I tend to use swimwear rubber (the kind used for leg openings, waistbands, and straps) that is typically 8mm wide. Mainly because I want to slay those waves, run about after my kids and a wider rubber just makes everything feel that bit more securer. What this means is that swimwear needs a little extra space in the seam to properly encase the elastic without bulk or distortion.
Lingerie, on the other hand, uses softer, more delicate elastics that fit comfortably within a 6mm allowance. Since lingerie isn't designed to handle chlorine, salt water, or high-intensity movement like swimwear, it doesn't need as much seam reinforcement.
How to Adjust a Lingerie Pattern for Swimwear
If you’ve fallen in love with a lingerie pattern and want to turn it into a stunning swimwear piece, you’ll need to add 2mm to all seams where elastic is applied. Here’s how:
Step 1: Identify the Key Areas
The areas that require adjustment are:
- Leg openings
-Armholes
- Waistbands
-Necklines (for swimsuits and bikinis)
Anywhere elastic will be sewn, you need to add extra room!
Step 2: Modify the Pattern
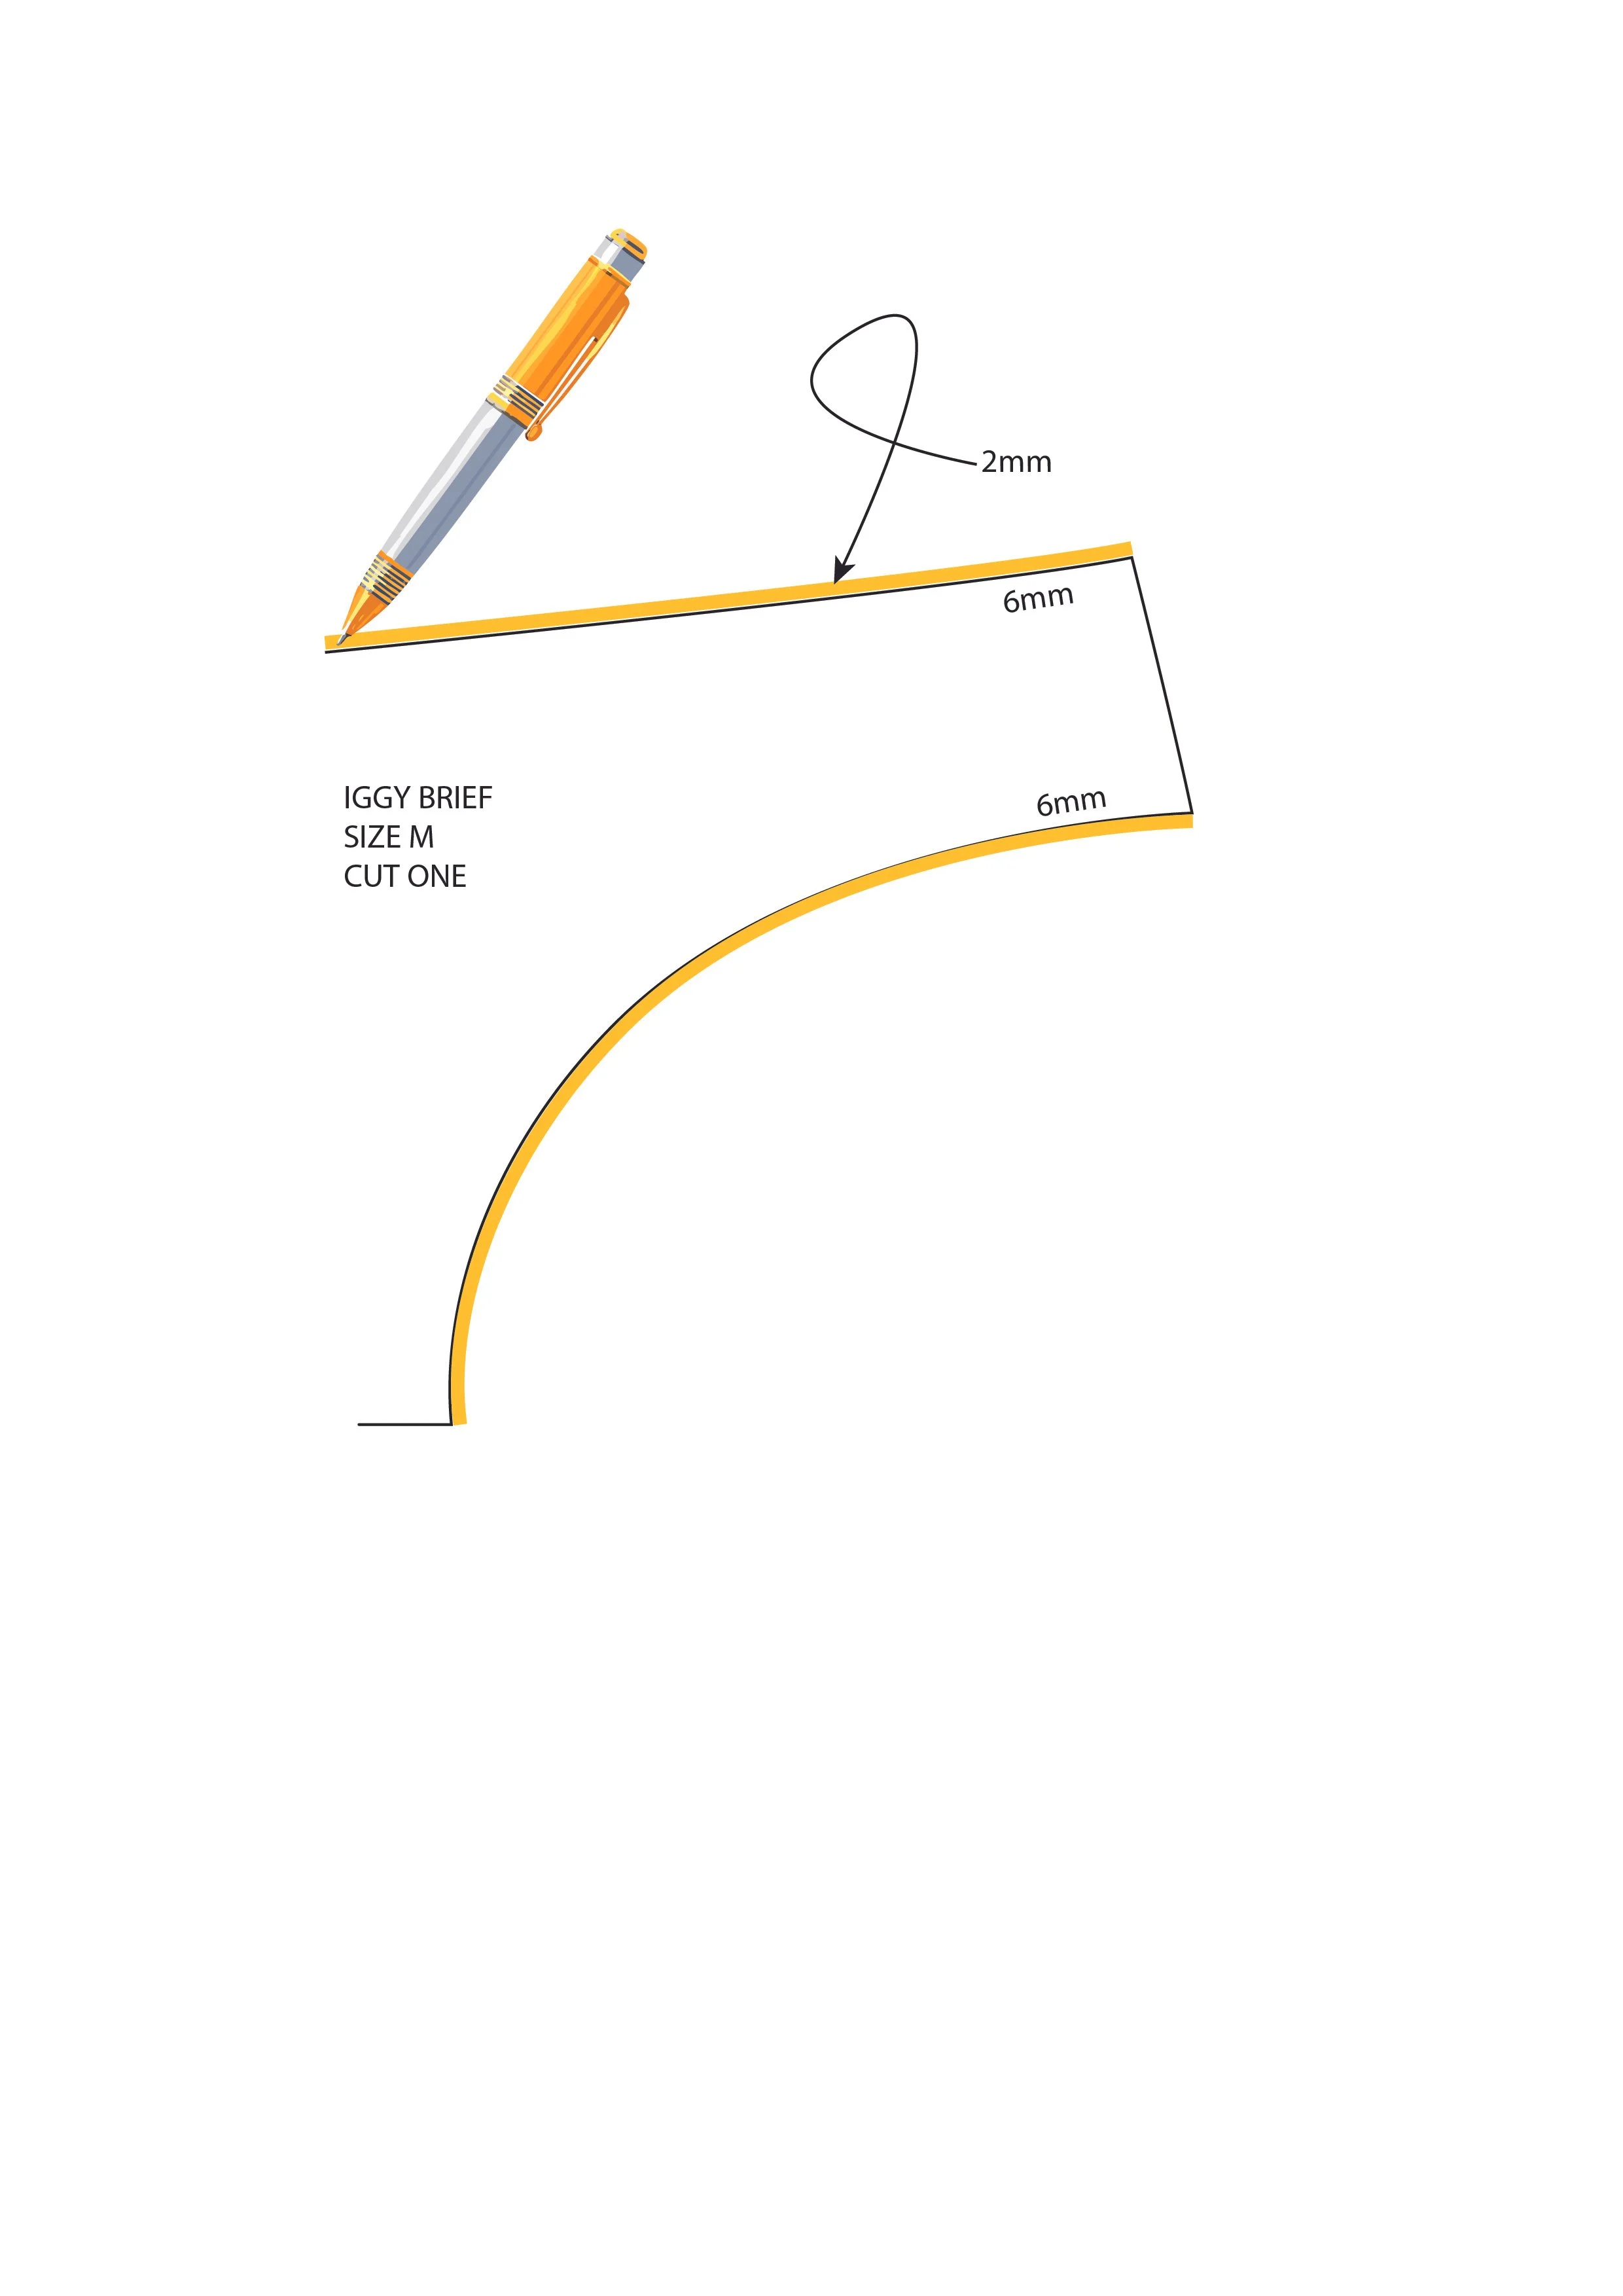
You would think I’d say go grab a ruler and extend the seam allowance by 2mm along all edges that have elastic. However, there is a simpler way, go grab a felt-tip and measure the width of your line, you are looking for a felt-tip which leaves a 2mm line, then all you are going to do is draw around the edges which have elastic and you’ve added your 2mm allowance. This is also a visual when you next reach for your pattern as you will be able to distinguish the swimwear patterns from the lingerie ones.
Step 3: Adjust Your Sewing Technique
Since swimwear fabric is thicker and stretchier than lingerie fabric, you'll need to use:
A zigzag or overlock stitch to handle high-stretch seams
Swimwear-specific elastic (often rubber-based) instead of lingerie picot or plush elastics
A walking foot (if your machine has one) to help manage slippery fabric (though don’t panic if you haven’t one, a regular foot will be fine).
Pro Tip: Keep Both Versions of the Pattern!
It sounds so simple but if you're planning to design both lingerie and swimwear for your brand, keep two separate versions of your patterns: one with 6mm seam allowances for lingerie and one with 8mm for swimwear. This will save you time and help keep your designs consistent!
Final Thoughts
Mastering seam allowances is one of those small-but-mighty skills that will make your lingerie and swimwear designs look and feel professional. Whether you’re crafting delicate lace bralettes or bold, sculpting bikinis.
Got any pattern-making struggles? Drop your questions in the comments or DM me on Instagram—I love helping new designers bring their visions to life!