
Using zig-zag stitch or 3-step stitch
When attaching elastic you need to use a stretch stitch so it stretches when the elastic does.
Using a normal straight stitch will result in the thread snapping when the elastic stretches. Although there are stitches such as straight stretch stitch and cover stitch (two Parallel stitches on the front and then on the underside a figure of eight close together between the two stitches). Today though it’s all about the 3-step or zig zag stitch.
A zig zag stitch is like this vvvvvvvvv it goes up and down like arrow heads, the 3-step is the same shape but for every line up and every line down there are three stitches. (so does what it says basically)
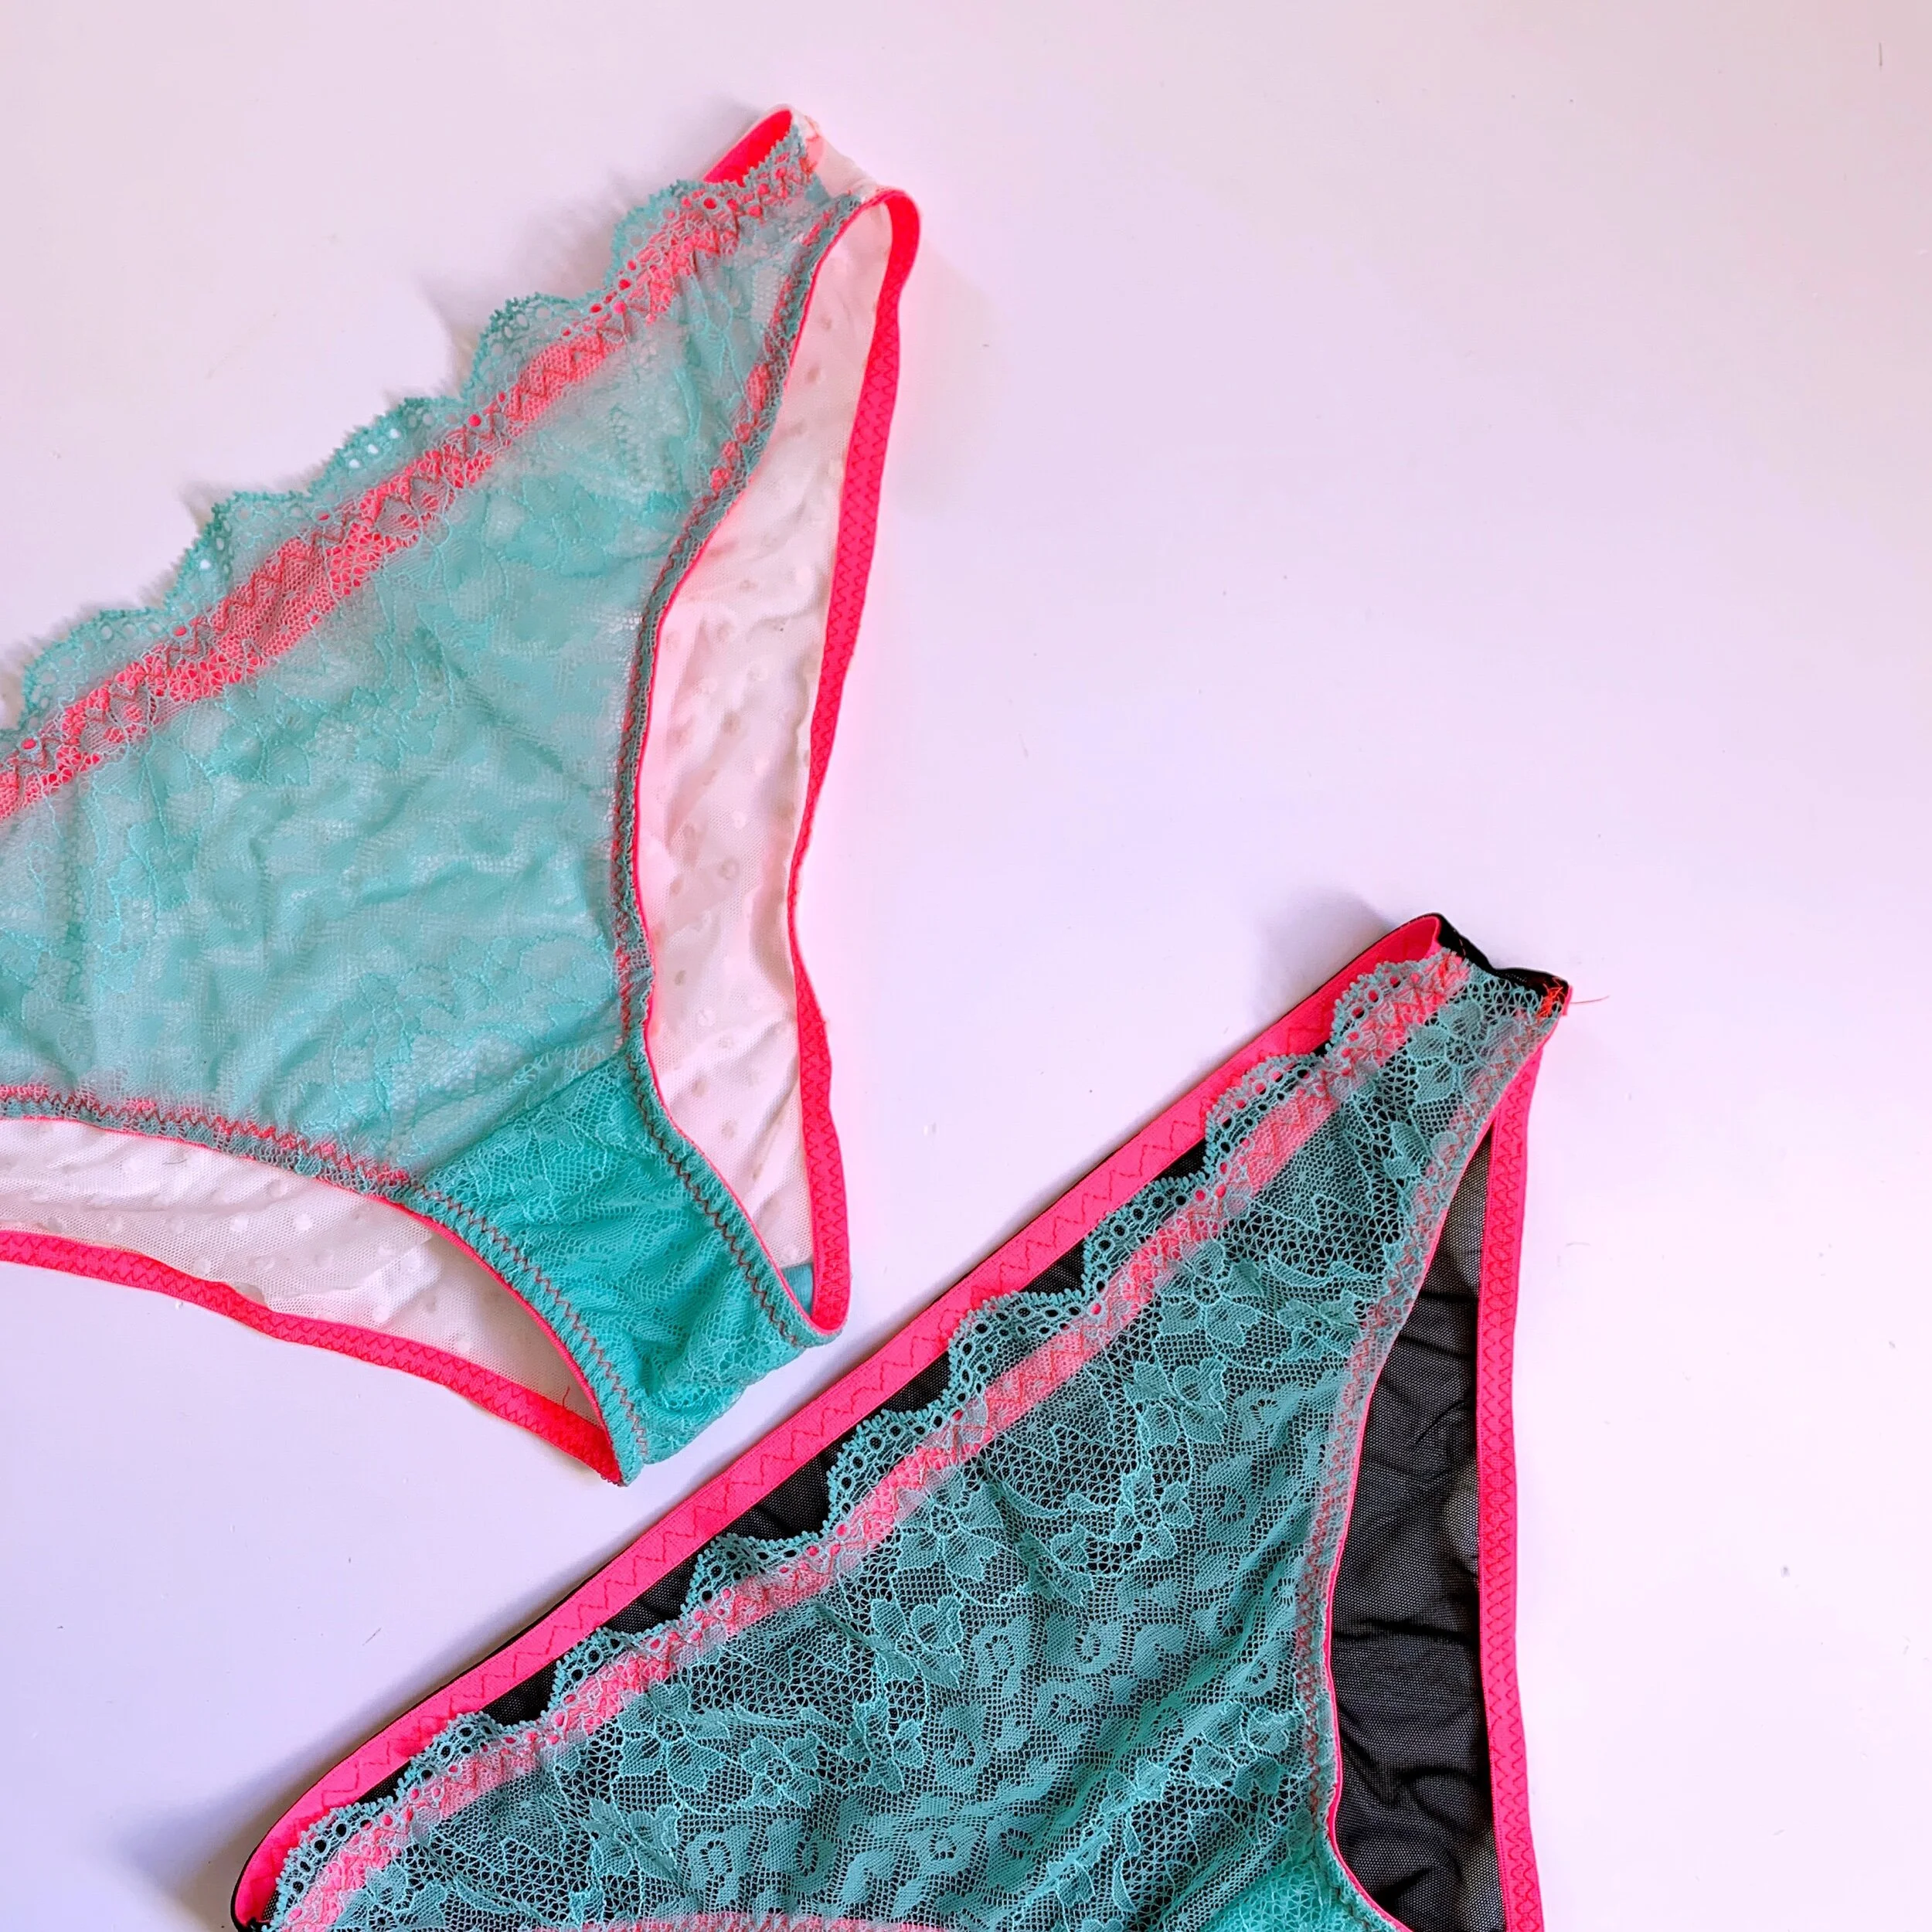
Using the zig-zag stitch or 3-step stitch is often left to preferably choice - personally I prefer the zig-zag, and tend to use that stitch as my first choice I find it neater especially on the outer side as you only see one row of stitching and when using wide elastic it attaches it at the edge, so you are guaranteed that you will be able to sew on the edge of the elastic. The 3-step width is determined by your machine and i find any errors that occur are more noticeable. I use the zig-zag on fold over elastic as well as normal elastic. I have used the zig zag stitch on the legs of the brief shown.
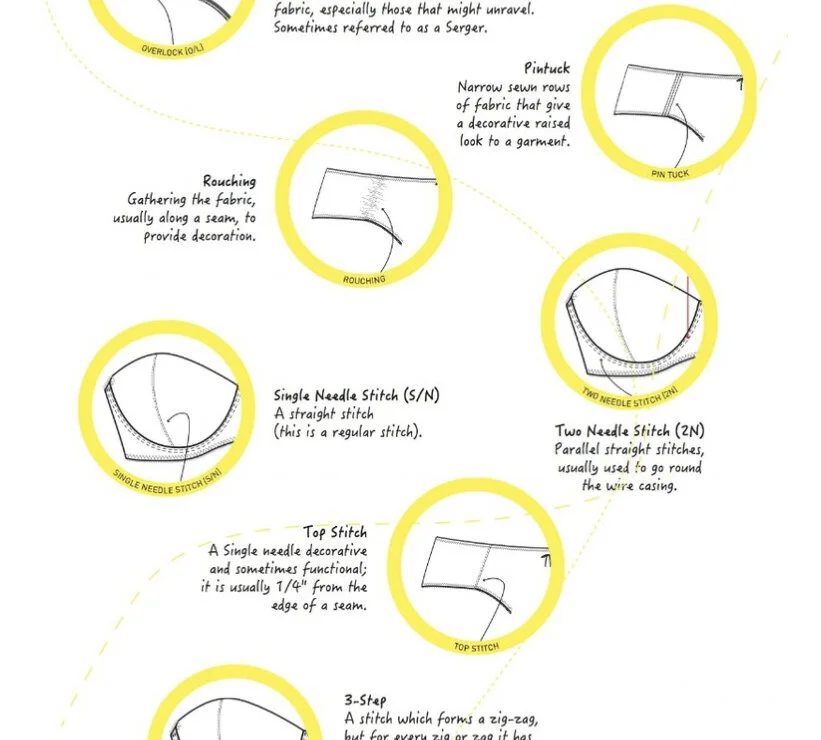
An example of different types of stitching from the book “how to write a bra and brief tech pack”
I would use the 3-step stitch behind edges of lace on the waist (or neckline or under-band) like on the brief shown. As well as under edges of elastics, I also tend to use the 3-step stitch on woven briefs or bras as you have to gain a lot of stretch over a small area of the garment, to (example) pull the briefs on and off, and find 3-step a better choice for this.
Please pin the image below if you need to come back to this article.

For more information about different stitching please see the book below
